How To Create A Gift Wrapping Zone & Wrap Like A Pro
There’s nothing quite like the feeling of giving a gift to a loved one. From the moment they hold your gift in their hands, it becomes this magical expression of love. No matter the appearance of the gift or the gift itself, there is no doubt the receiver will be bursting with gratitude. With that, there is something so special about an intentional gift wrapping job that takes the experience to the next level. To help you wrap like a pro, I have collected some of my top tips and gift wrapping essentials for you!
Step 1 - The Station
For anything to be successful, we need a strong foundation (aka the perfect gift wrapping station). Find an area in your home that you can zone as your gift wrapping station. The purpose of this station is to create a system that keeps all your necessities in one area, making things as efficient as possible. Nobody wants to spend their time searching for supplies, instead of gift wrapping.
When deciding on your gift wrapping station, the most important thing is to find something that serves you, your space, and your needs. Here are a few of my favorite options:
Under The Bed: I love gift wrapping boxes like these for storing all my essentials. You have a section for wrapping paper, ribbon, scissors, tape, and cards. This makes it so easy to consolidate everything in one box, and slide it under the bed.
Storage Cart: You probably already know how much I love a storage cart. I love this mobile option because it’s accessible and convenient. You can easily keep it in a closet or other room, and simply pull it out when you need it. This cart even has specific slots for wrapping paper on the sides!
Go Vertical: One of my favorite storage solutions (in general) is utilizing vertical space. I love using storage solutions like Hanging Gift Wrap Organizer or Wrap Racks. You can put these over the door or even just in a small area of your closet. They make it so easy to grab all your wrapping necessities.
Step 2 - Edit, Donate & Recycle
My best suggestion is to go through your existing gift wrap and declutter. Take out all your current wrapping paper and remove any that you no longer like or are simply too wrinkled. If it’s not too damaged, look in to donating or offering to a neighbor. If not, check to see if the paper can be recycled.
Step 3 - Restock
I refuse to let anybody be in the scenario where they are wrapping gifts on Christmas Eve and run out of scotch tape. I am not saying overbuy with a lifetime supply of gift tags from Costco, but do supply yourself with enough to safely get you through your gifts (and any last minute gifts that might come through). The list will be slightly shifted for each person, but here is a general supply list I suggest:
Wrapping Paper
Gift Boxes
Tape
Sharp scissors
Gift Bags (various sizes)
Colored & neutral gift paper
Twine or string
Ribbon
Gift Tags
Sharpie Marker and Pens
Gift Card Boxes
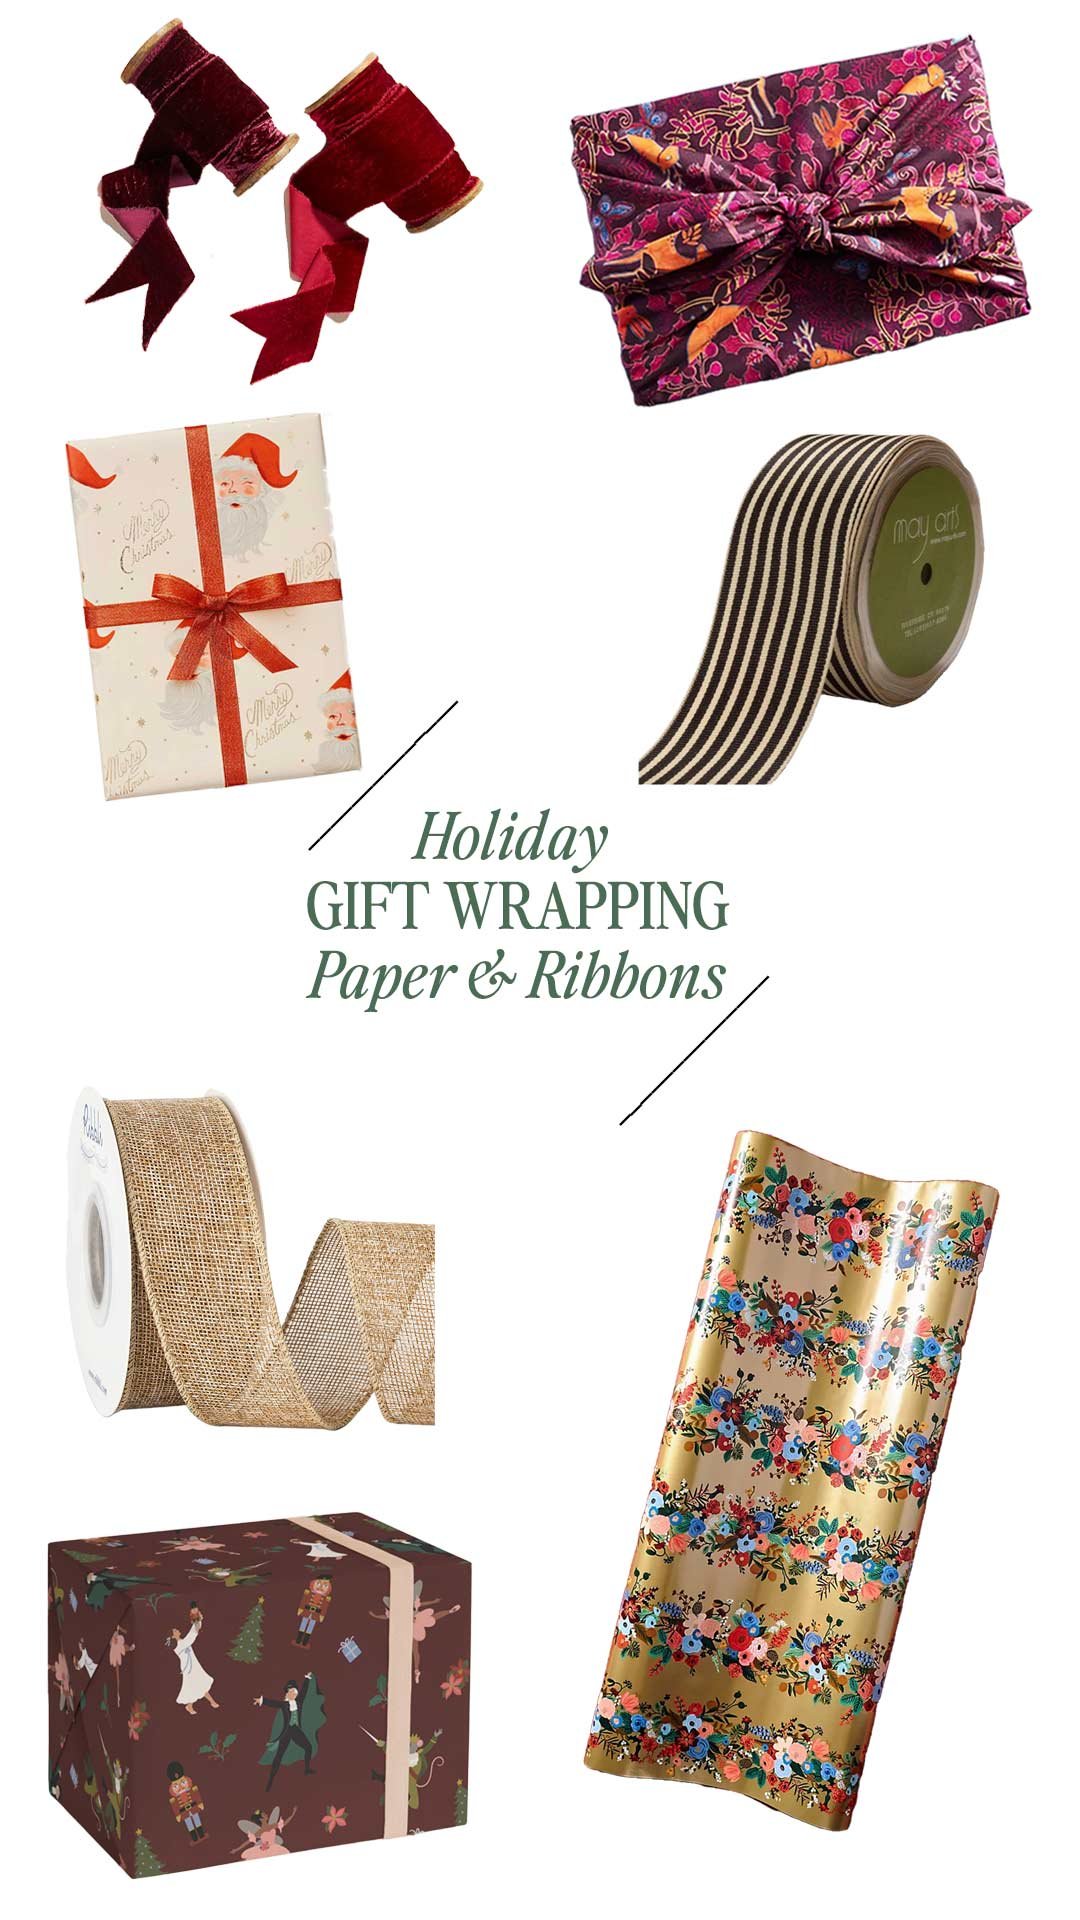
If you are looking for some gift wrapping paper and ribbon inspo, here are a few of my absolute favorites:
Velvet Ribbon - $22
Gift Wrapping Cloth - $18
Santa Wrapping Roll - $11
Wide Striped Ribbon - $22
Burlap Wired Ribbon - $9
Nutcracker Suite - $15
Step 4- Find Gift Wrapping Accessories
By no means am I saying you need any of these! With that, I have found these wrapping accessories make everything more efficient.
The Little ELF Gift Wrap Cutter- If you have ever found yourself frustrated with uneven wrapping paper cutting, this is for you. It’s so easy to slide on and create the perfect, straight cut.
Wrap Buddies Wrapping Tool- I can’t begin to explain how much easier this tool makes wrapping presents. It secures wrapping paper and makes it so easy to hold and unravel wrapping paper.
WrapMaster Wrapping Paper Cutter- This is another scissor alternative I love! Makes it so easy (& safe) to tear paper.
Step 5- Contain Smaller Accessories
Now that you have all the zone and supplies you need and desire, my best advice is to categorize and contain. There is nothing less motivating than a cluttered work station where you can’t find anything. Not to mention, small items, like ribbons and tags, love to get lost in the mix.
If you are using a gift wrapping box or an over-the-door hanger, you likely already have specific slots for all your small items. I love these options because it makes it so easy to separate and contain each of your wrapping essentials. If you are going the route of a cabinet, or storage cart, I love to use various products to keep everything organized:
Bamboo Drawer Dividers - $33
Stackable Drawers - $23
Large Bins - $10
Acrylic Turntable - $32
Step 6 - Find Your Wrapping Style
Now that your foundation is set, it’s time to play with a unique wrapping style that fits you. If you are looking for some visual inspiration, I am posting some of my favorite wrapping styles and bow tying methods on Instagram Reels to support each of you.
More important than your gift wrapping aesthetic, is the time you have with your family and loved ones. My hope is that with your new gift wrapping zone, the process will be more efficient than ever, leaving you time for the things that matter most.


